From drone photo to annotated listing shot.
Everything runs in your browser — photos never upload anywhere. Drop a drone photo in and the EXIF GPS plus camera attitude place nearby points of interest on the image automatically; the rest of this page is the handful of gestures that make the result perfect.
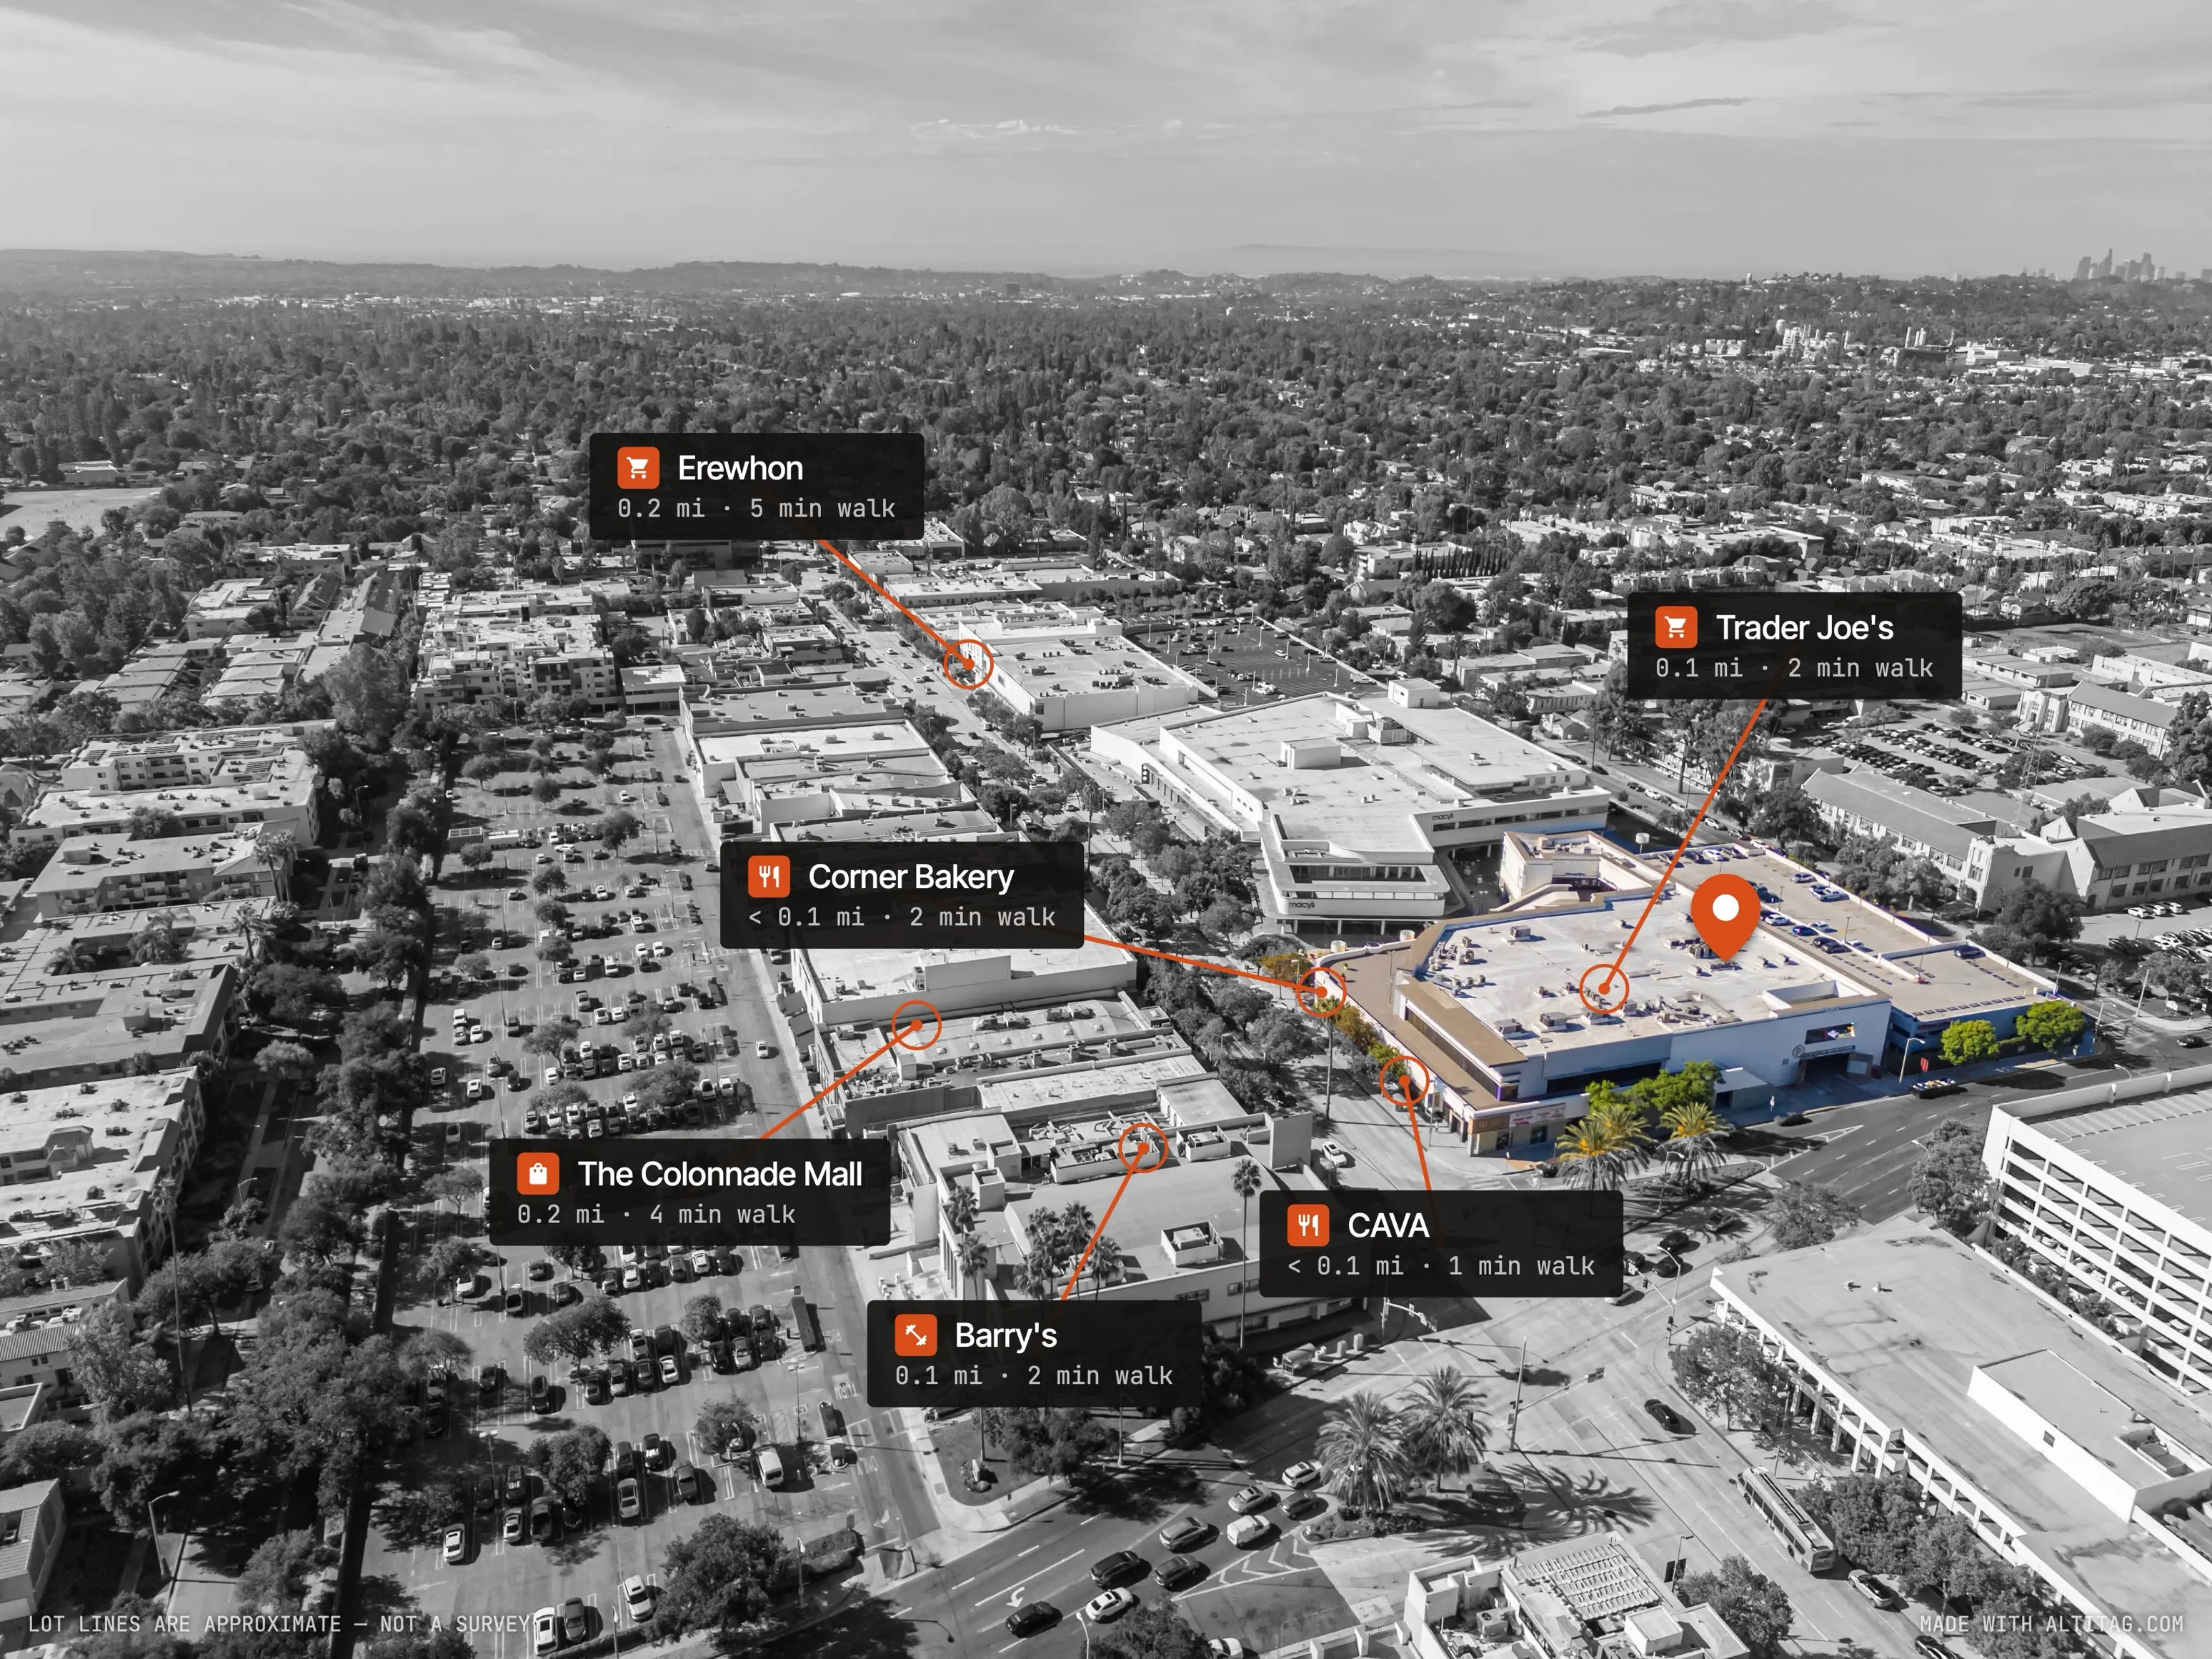
First, what you get without touching anything: the moment a photo lands, Altitag reads the GPS position and camera angles from its EXIF, finds the notable places nearby, picks the most relevant handful, and lays them out on the image — names, category icons, distances and walk times already computed, labels already spread so they don't overlap. A typical photo is listing-ready in seconds. Everything below is the optional fine-tuning on top of that automatic result, and most photos only need a little of it.
1 · Labels: drag the text, or drag the dot
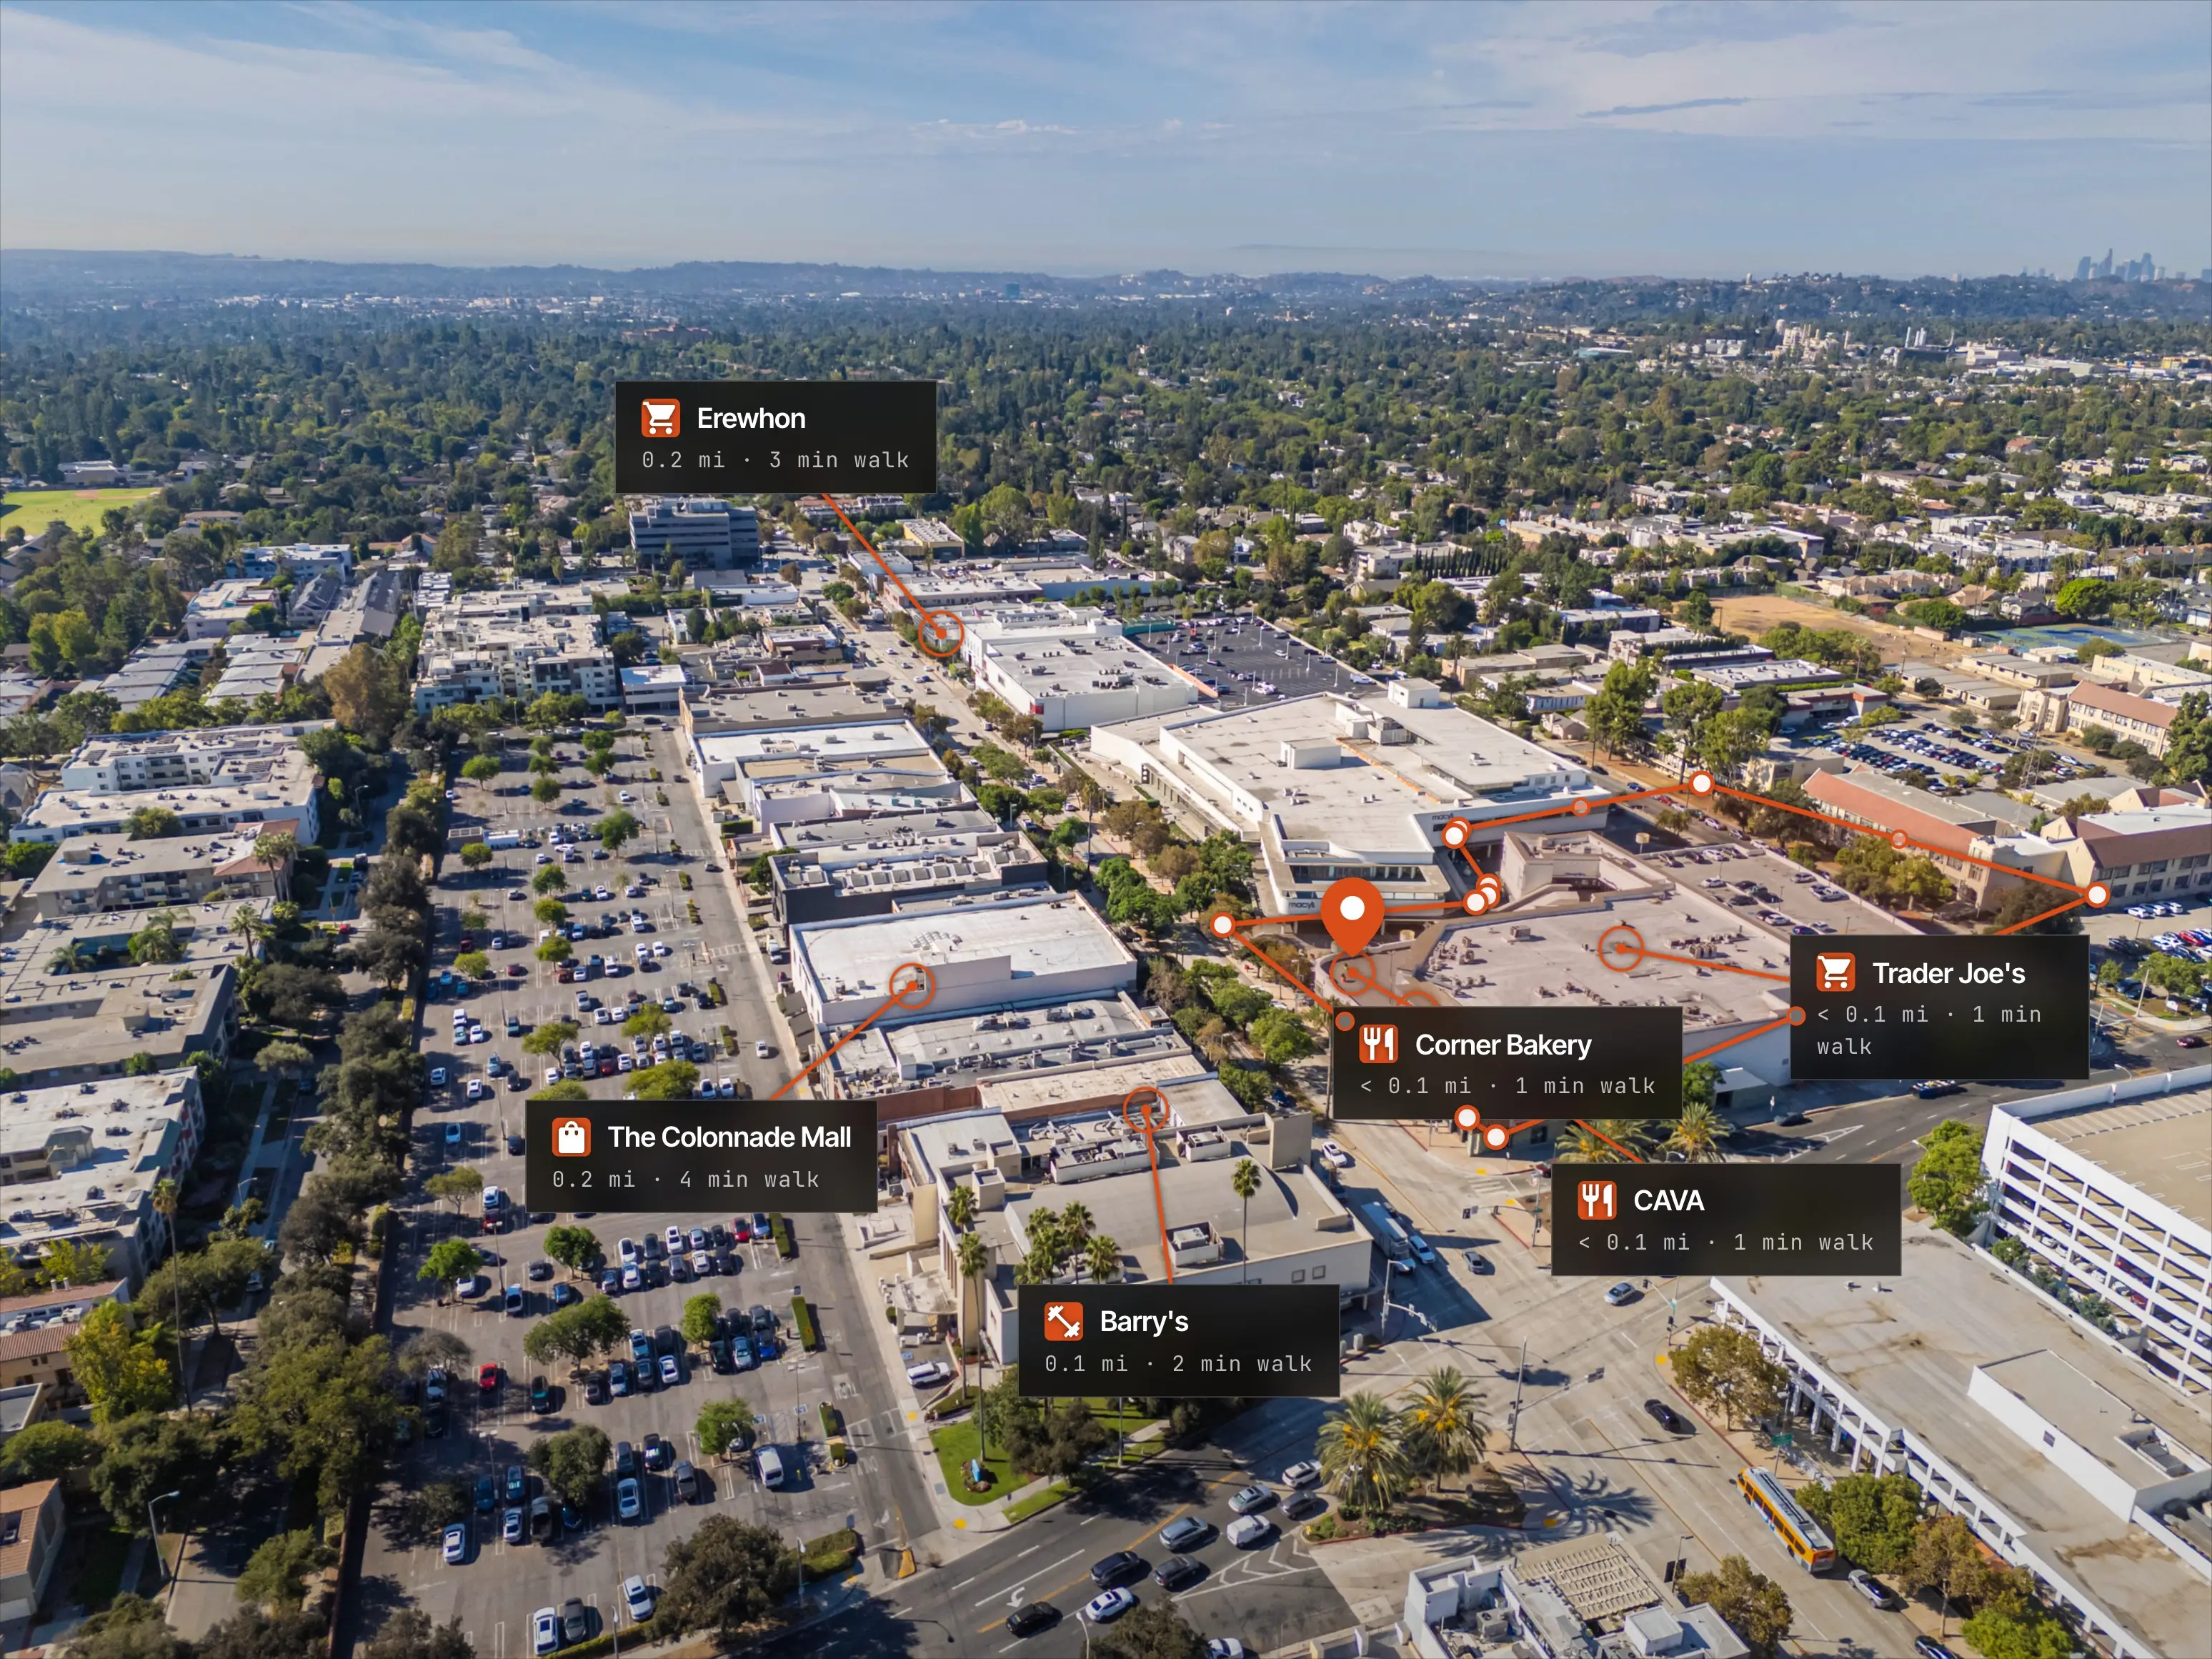
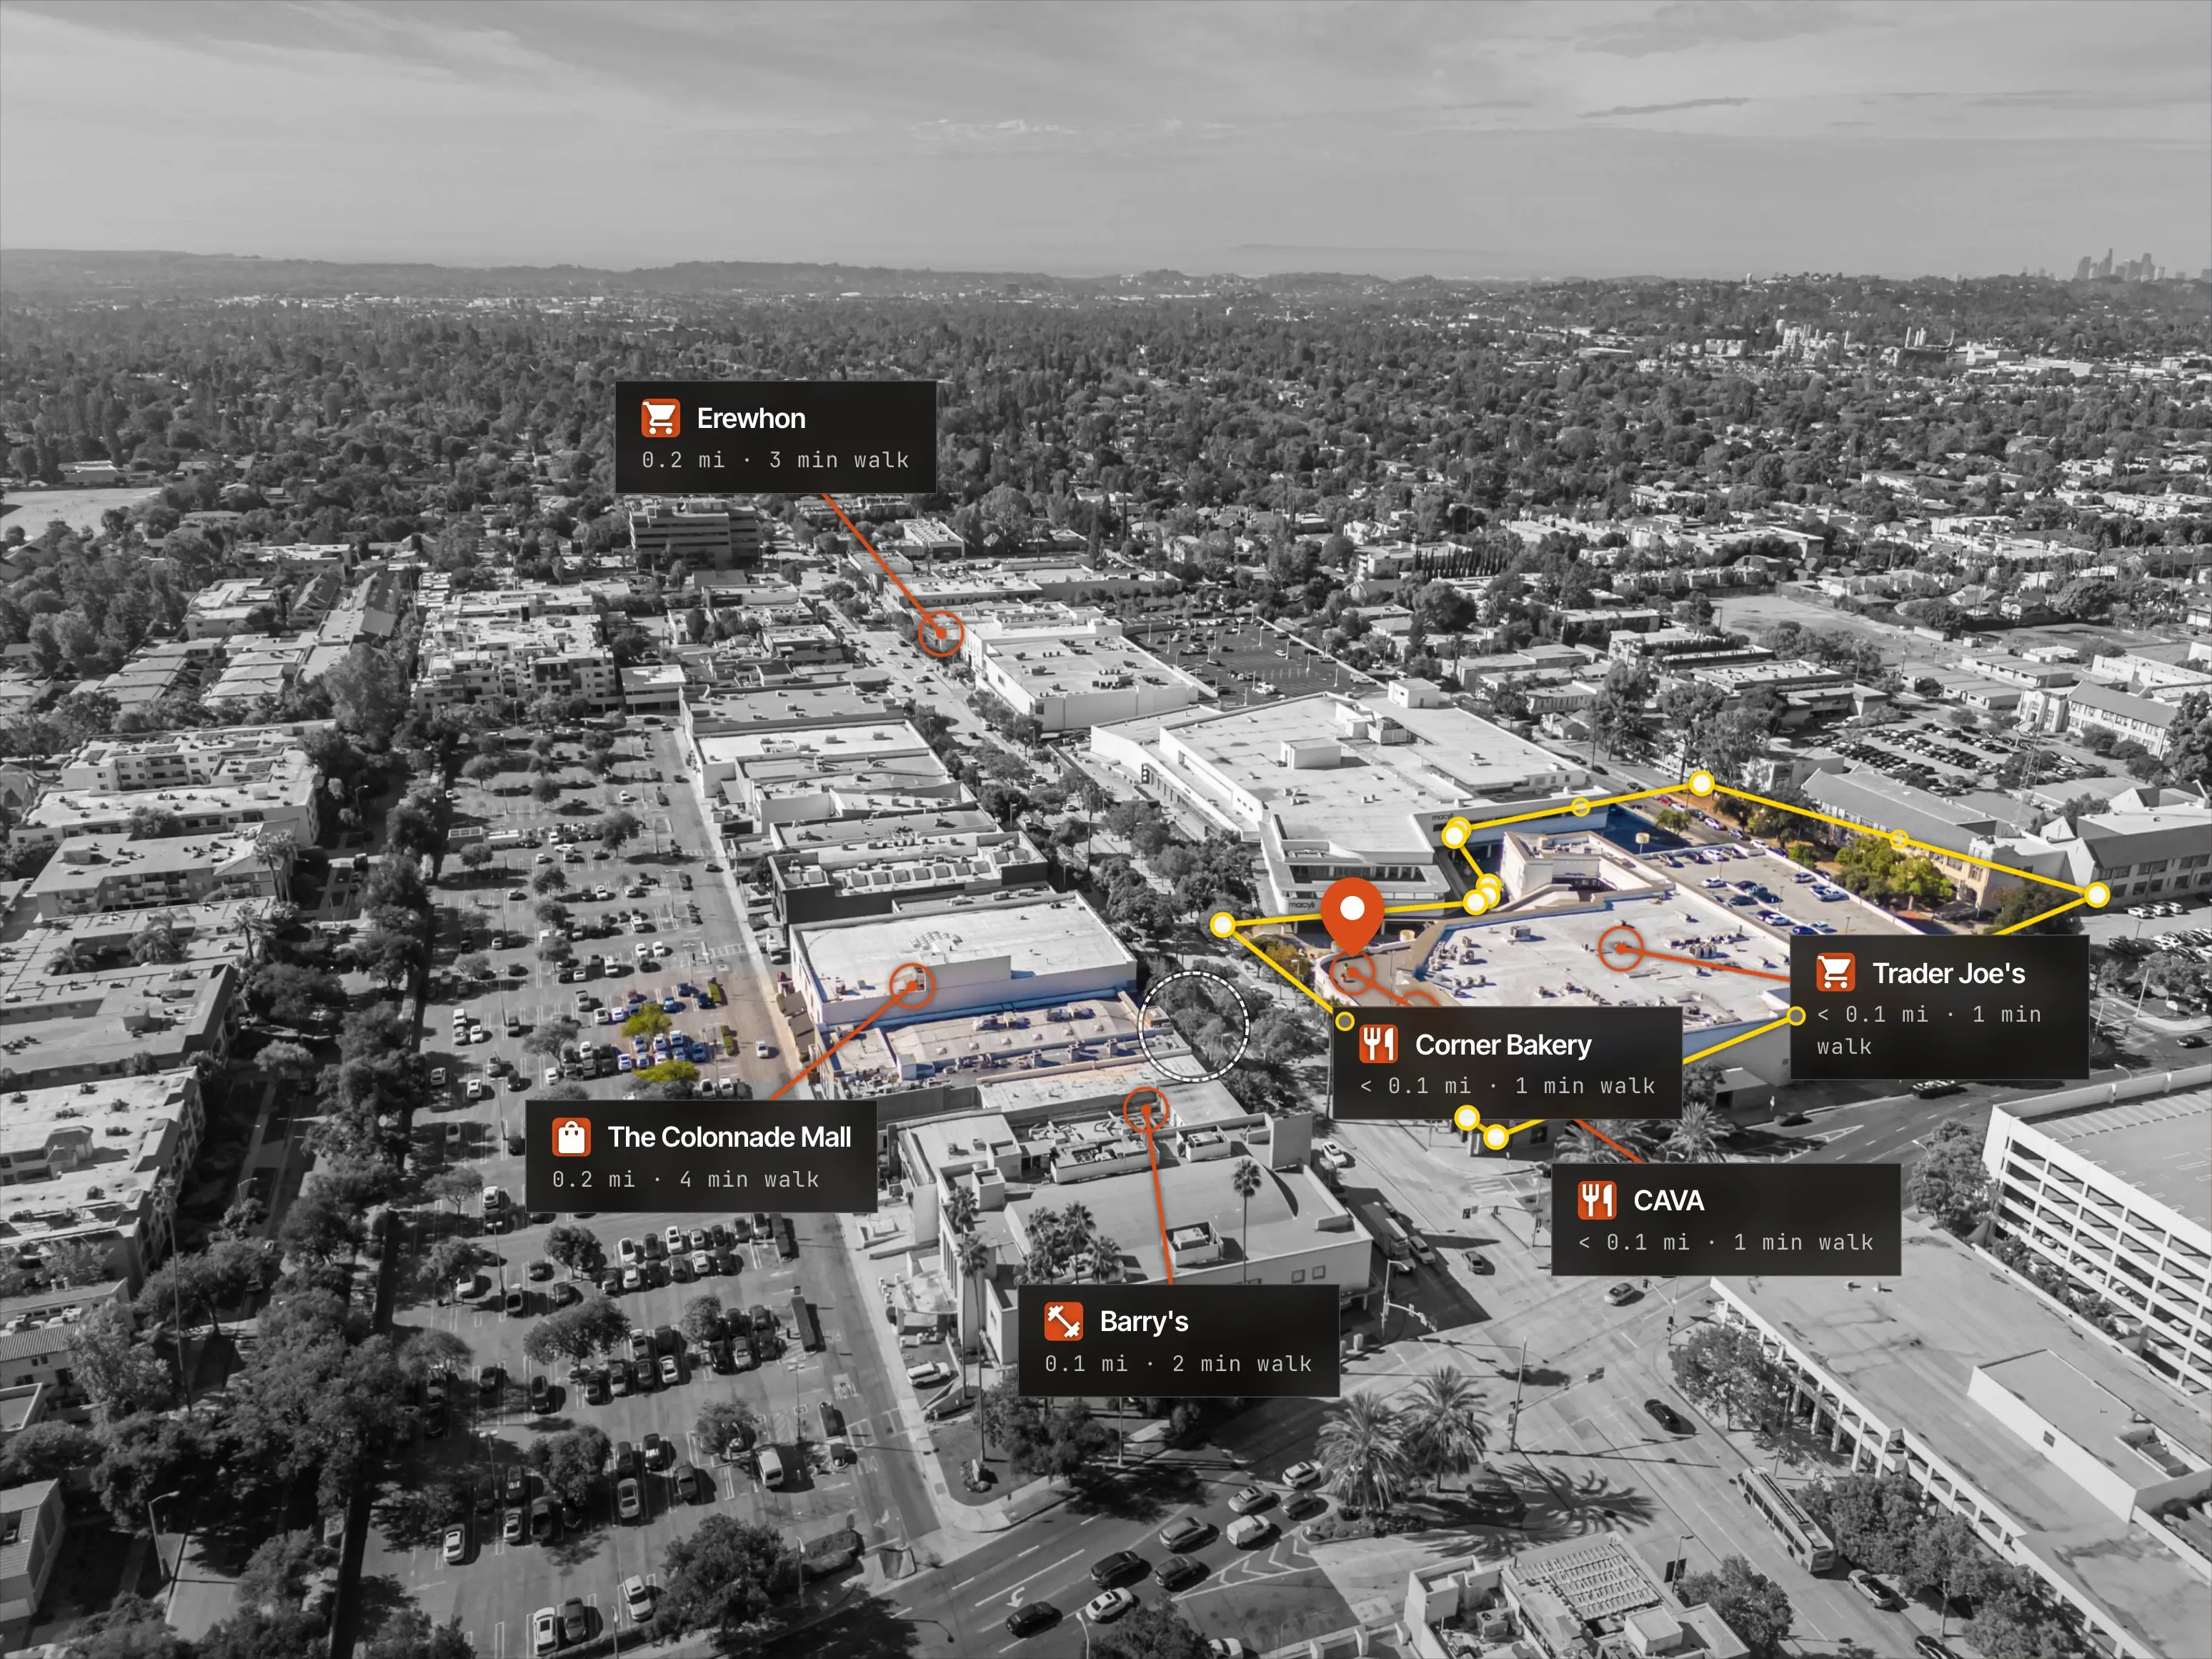
Every annotation has two draggable parts. Dragging the label just moves the text — use it to declutter. Dragging the dot (click a label first; a dashed circle appears on its target) tells Altitag "this place is actually here", and that does something much bigger: it recalibrates the camera.
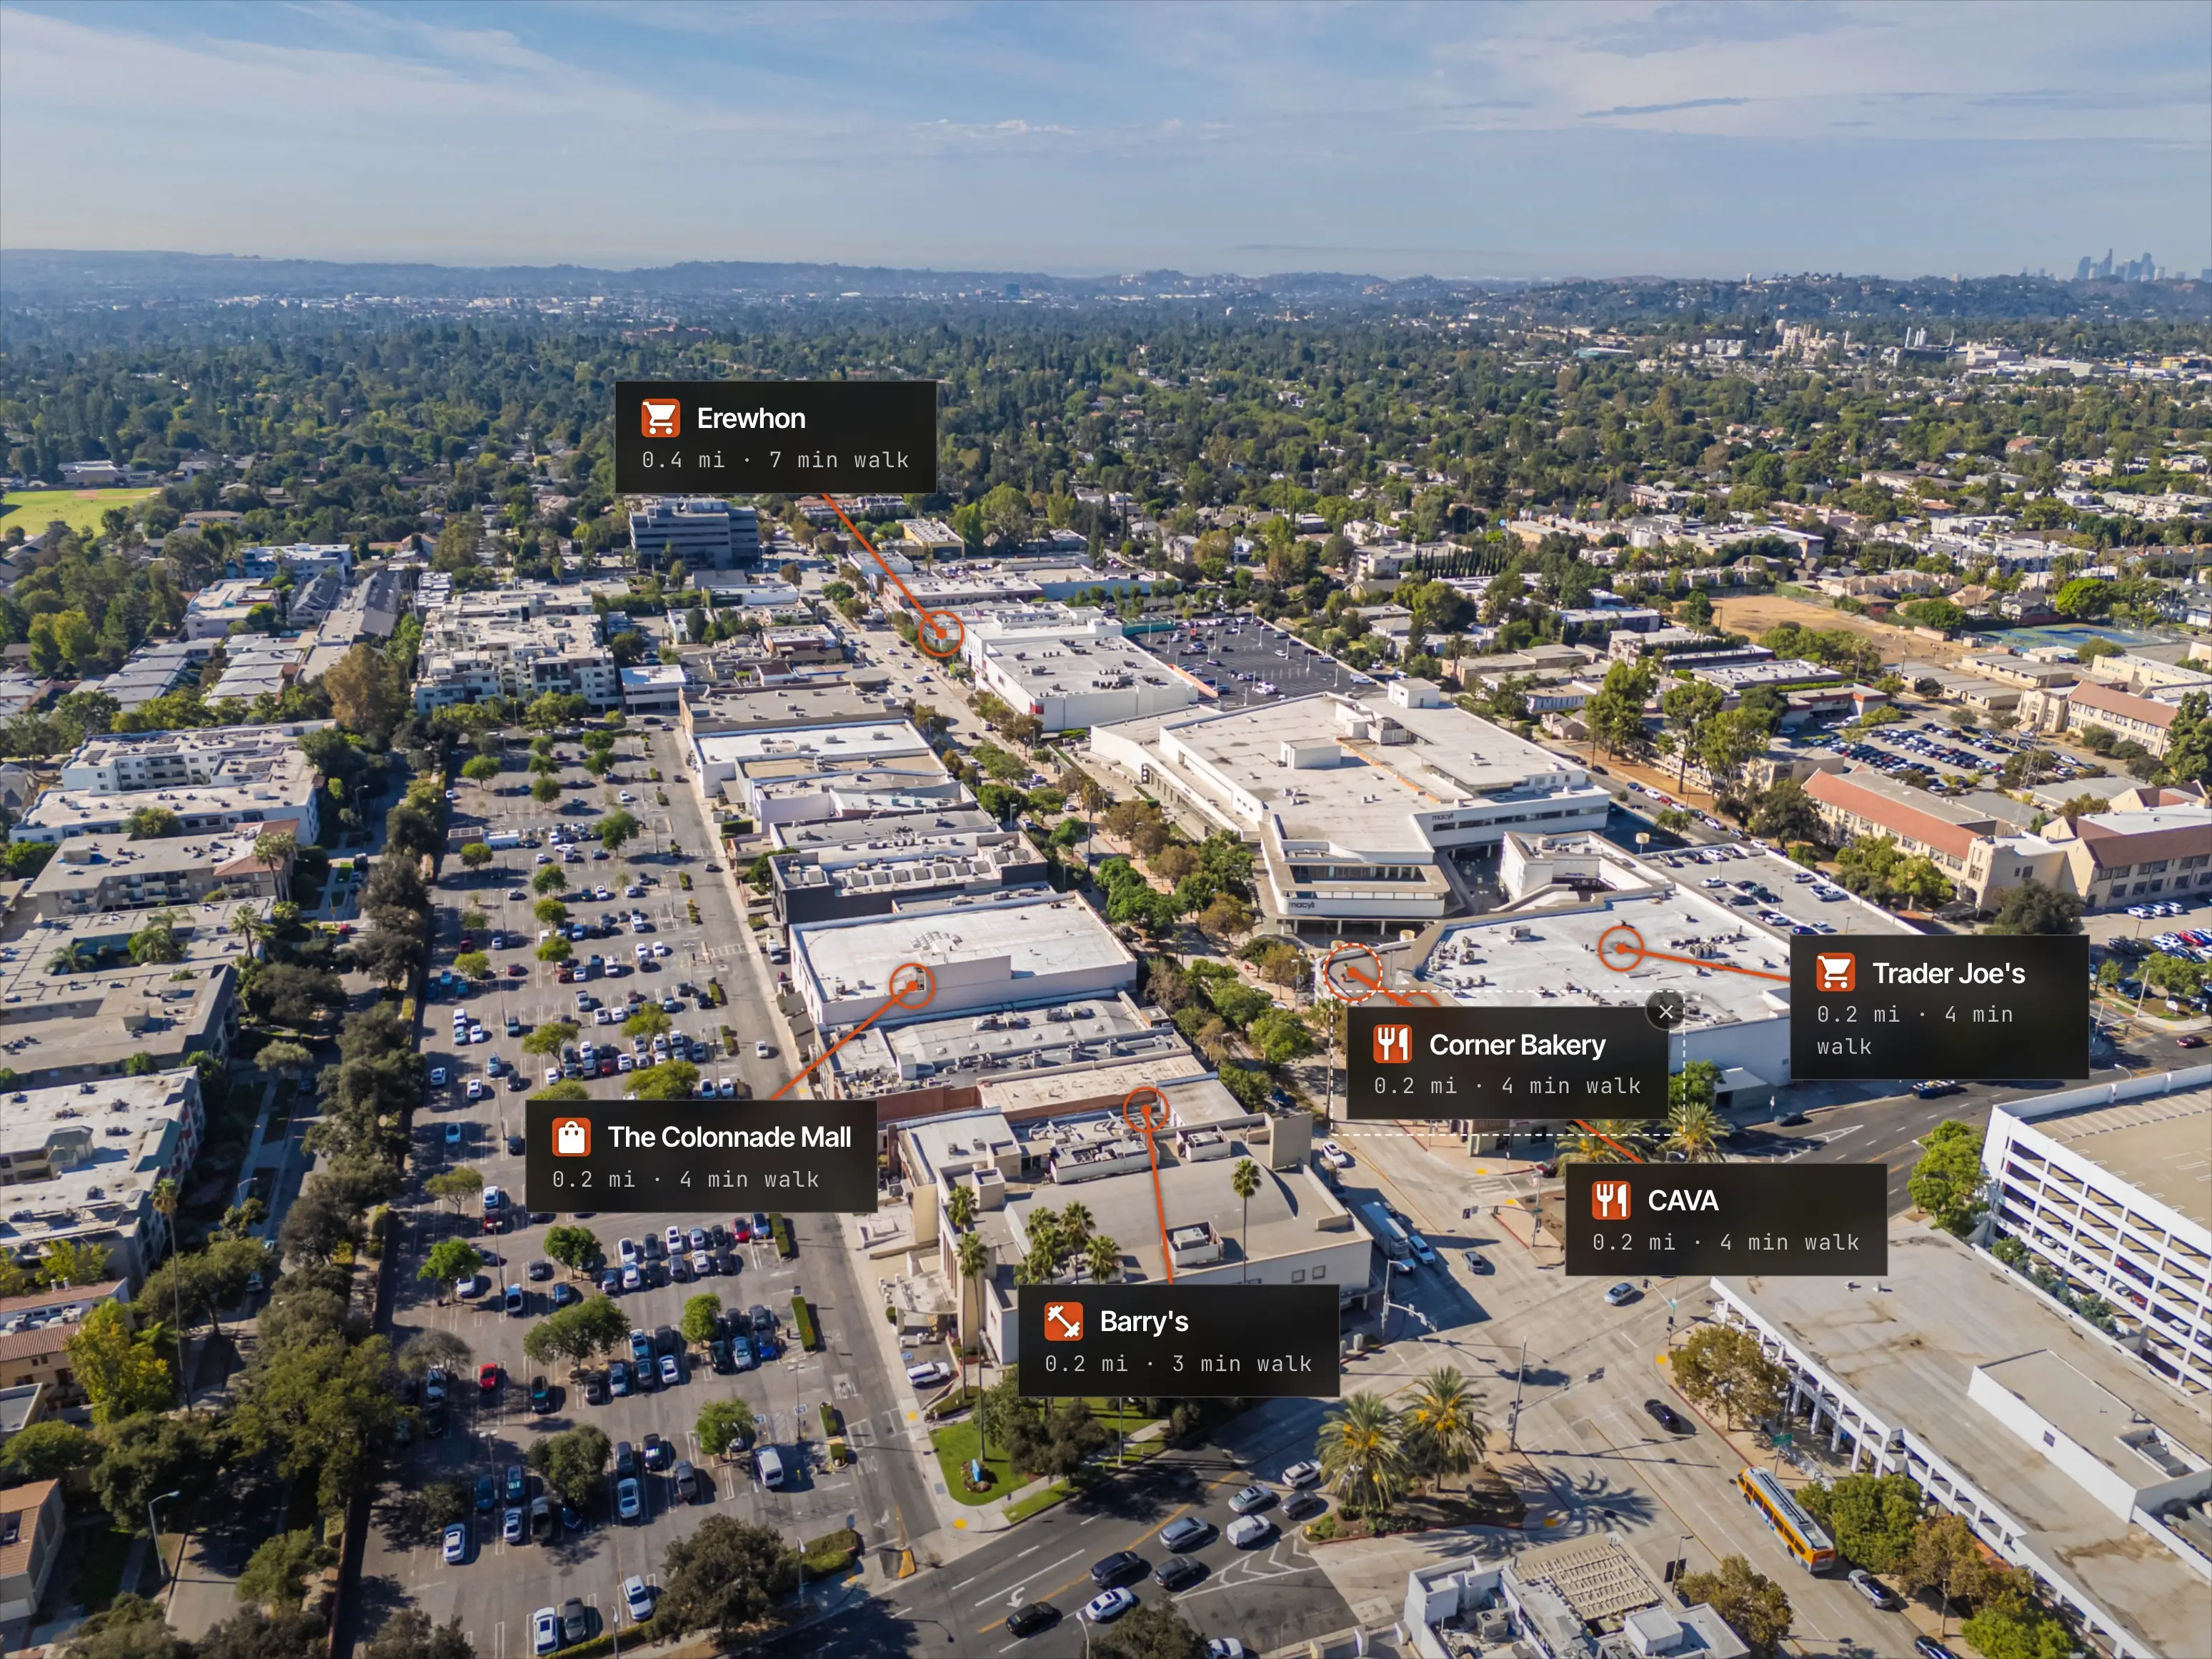
Drone compasses are only good to a degree or two, and at a few hundred meters that shifts every label a building over. Drag one dot onto the building it names and every other annotation snaps into place. A second dot also corrects the lens estimate; a third corrects altitude. This is the highest-leverage gesture in the editor — if anything looks misaligned (labels and the lot outline), fix it here first.
2 · The property pin
Distances and walk times measure from the camera until you tell Altitag where the listing actually is. Click PROPERTY PIN in the toolbar and either type the address or drop a pin straight on the photo. Every distance, walk and drive time then measures from the pin, even when the property is out of frame. The pin is draggable afterwards — move it freely to the exact unit or entrance.
A quick word on Pro, since it first shows up here: everything on this page is free to use — every editing tool works without an account, with place data from OpenStreetMap and a small Altitag mark on exports. Altitag Pro is the paid upgrade ($29/month, or a $19 credit pack for 10 images — details) that automates the data-heavy parts: verified Google Places data with ratings, true address autocomplete — partial input and unit numbers ("1127 E Del Mar Blvd #111") resolve to an exact rooftop point — the lot outline in the next section, and watermark-free exports.
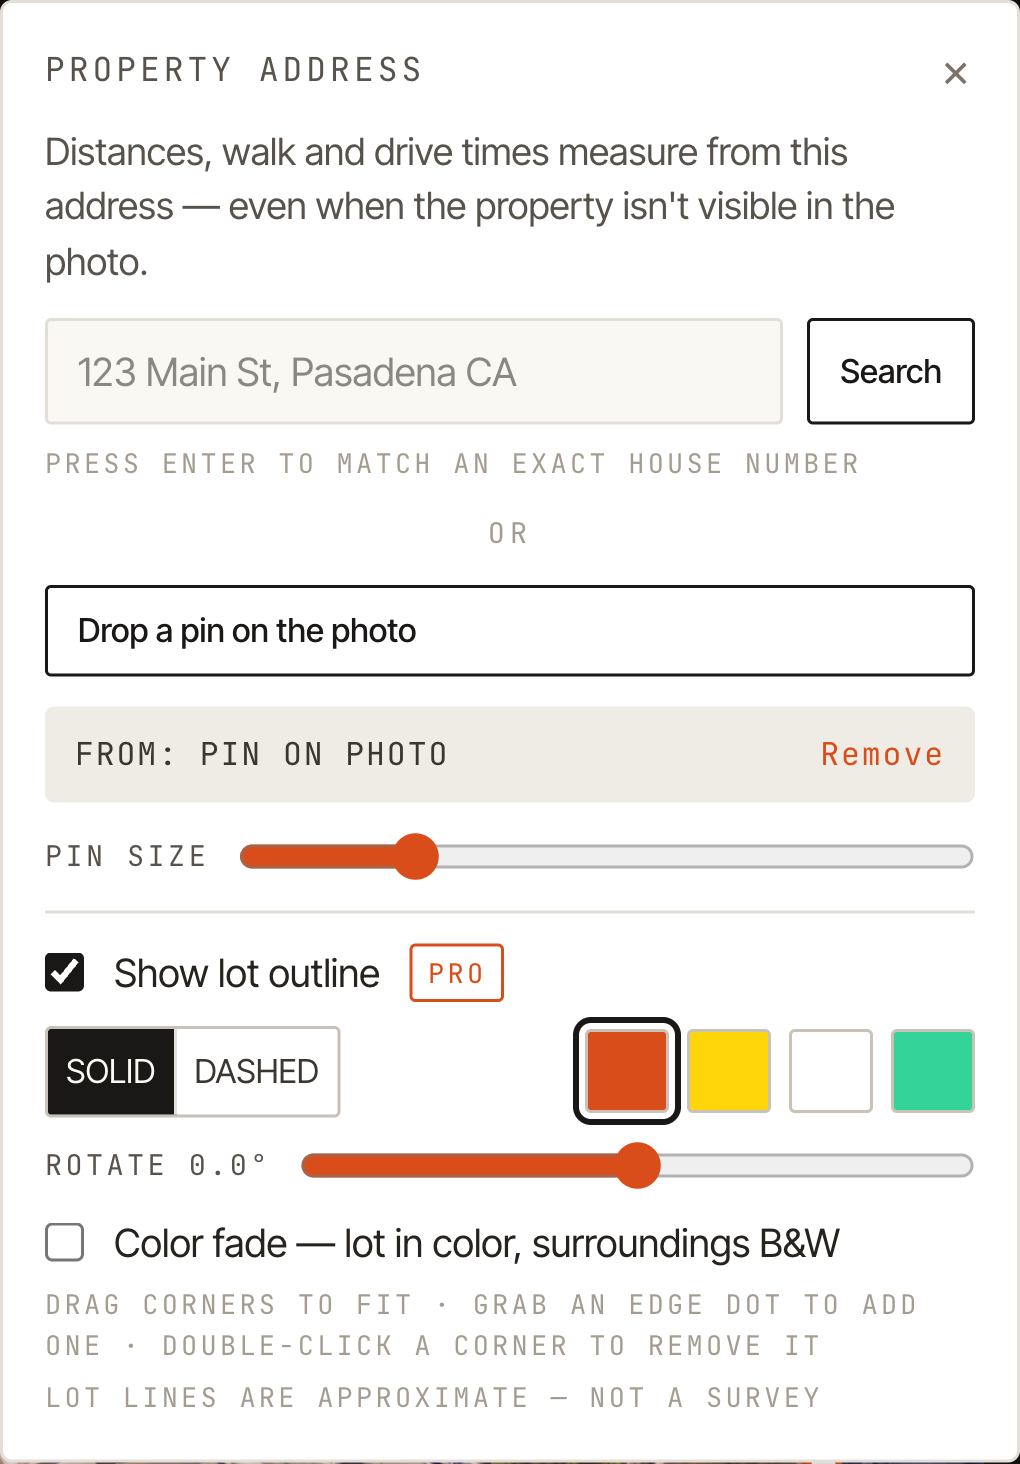
The pin also doubles as the anchor for the lot outline below — and moving it never wipes a fitted outline.
3 · Lot outline PRO
Tick Show lot outline in the property pin panel and Altitag pulls the assessor's parcel for the property — the pin location when set, the photo's GPS otherwise — and projects it onto the image. Covered today: all of Florida, North Carolina, New Jersey, Massachusetts, Maryland, Tennessee, Colorado, Utah and Montana, plus Southern California (Los Angeles, Orange and San Diego counties), Phoenix, Las Vegas, Seattle, Houston, Dallas, Austin, Chicago, Atlanta and metro Detroit — with more areas coming. Outside coverage you're not stuck: Altitag drops a starter quad on the property instead, and the same fitting tools below let you trace the lot by hand.
County linework is drawn from assessor maps, not registered to aerial imagery, so expect it to sit a few meters off the fence line. Fitting it takes seconds:
- Drag inside the polygon to shift the whole lot as one block.
- Drag a corner dot to fine-tune one corner.
- Grab a small edge dot to add a corner mid-edge and bend the line.
- Double-click a corner to remove it.
- Drag the ⟳ grip above the lot (or use the Rotate slider in the panel) to square the outline to the streets when the whole polygon sits tilted — that tilt is compass error, so dragging a POI dot (section 1) fixes it for the lot and every label at once.
Pick the line color and solid / dashed / none in the panel. Lot lines are a marketing illustration, not a survey — never use them to represent a legal boundary. Exports carry a small disclaimer line by default for exactly that reason; you can reword it or turn it off in the lot options.
4 · Color fade
The signature look: the lot stays in full color while everything around it goes black-and-white. Tick Color fade in the lot options. Set the border to NONE to let color alone mark the property — the editing dots tuck away with it.
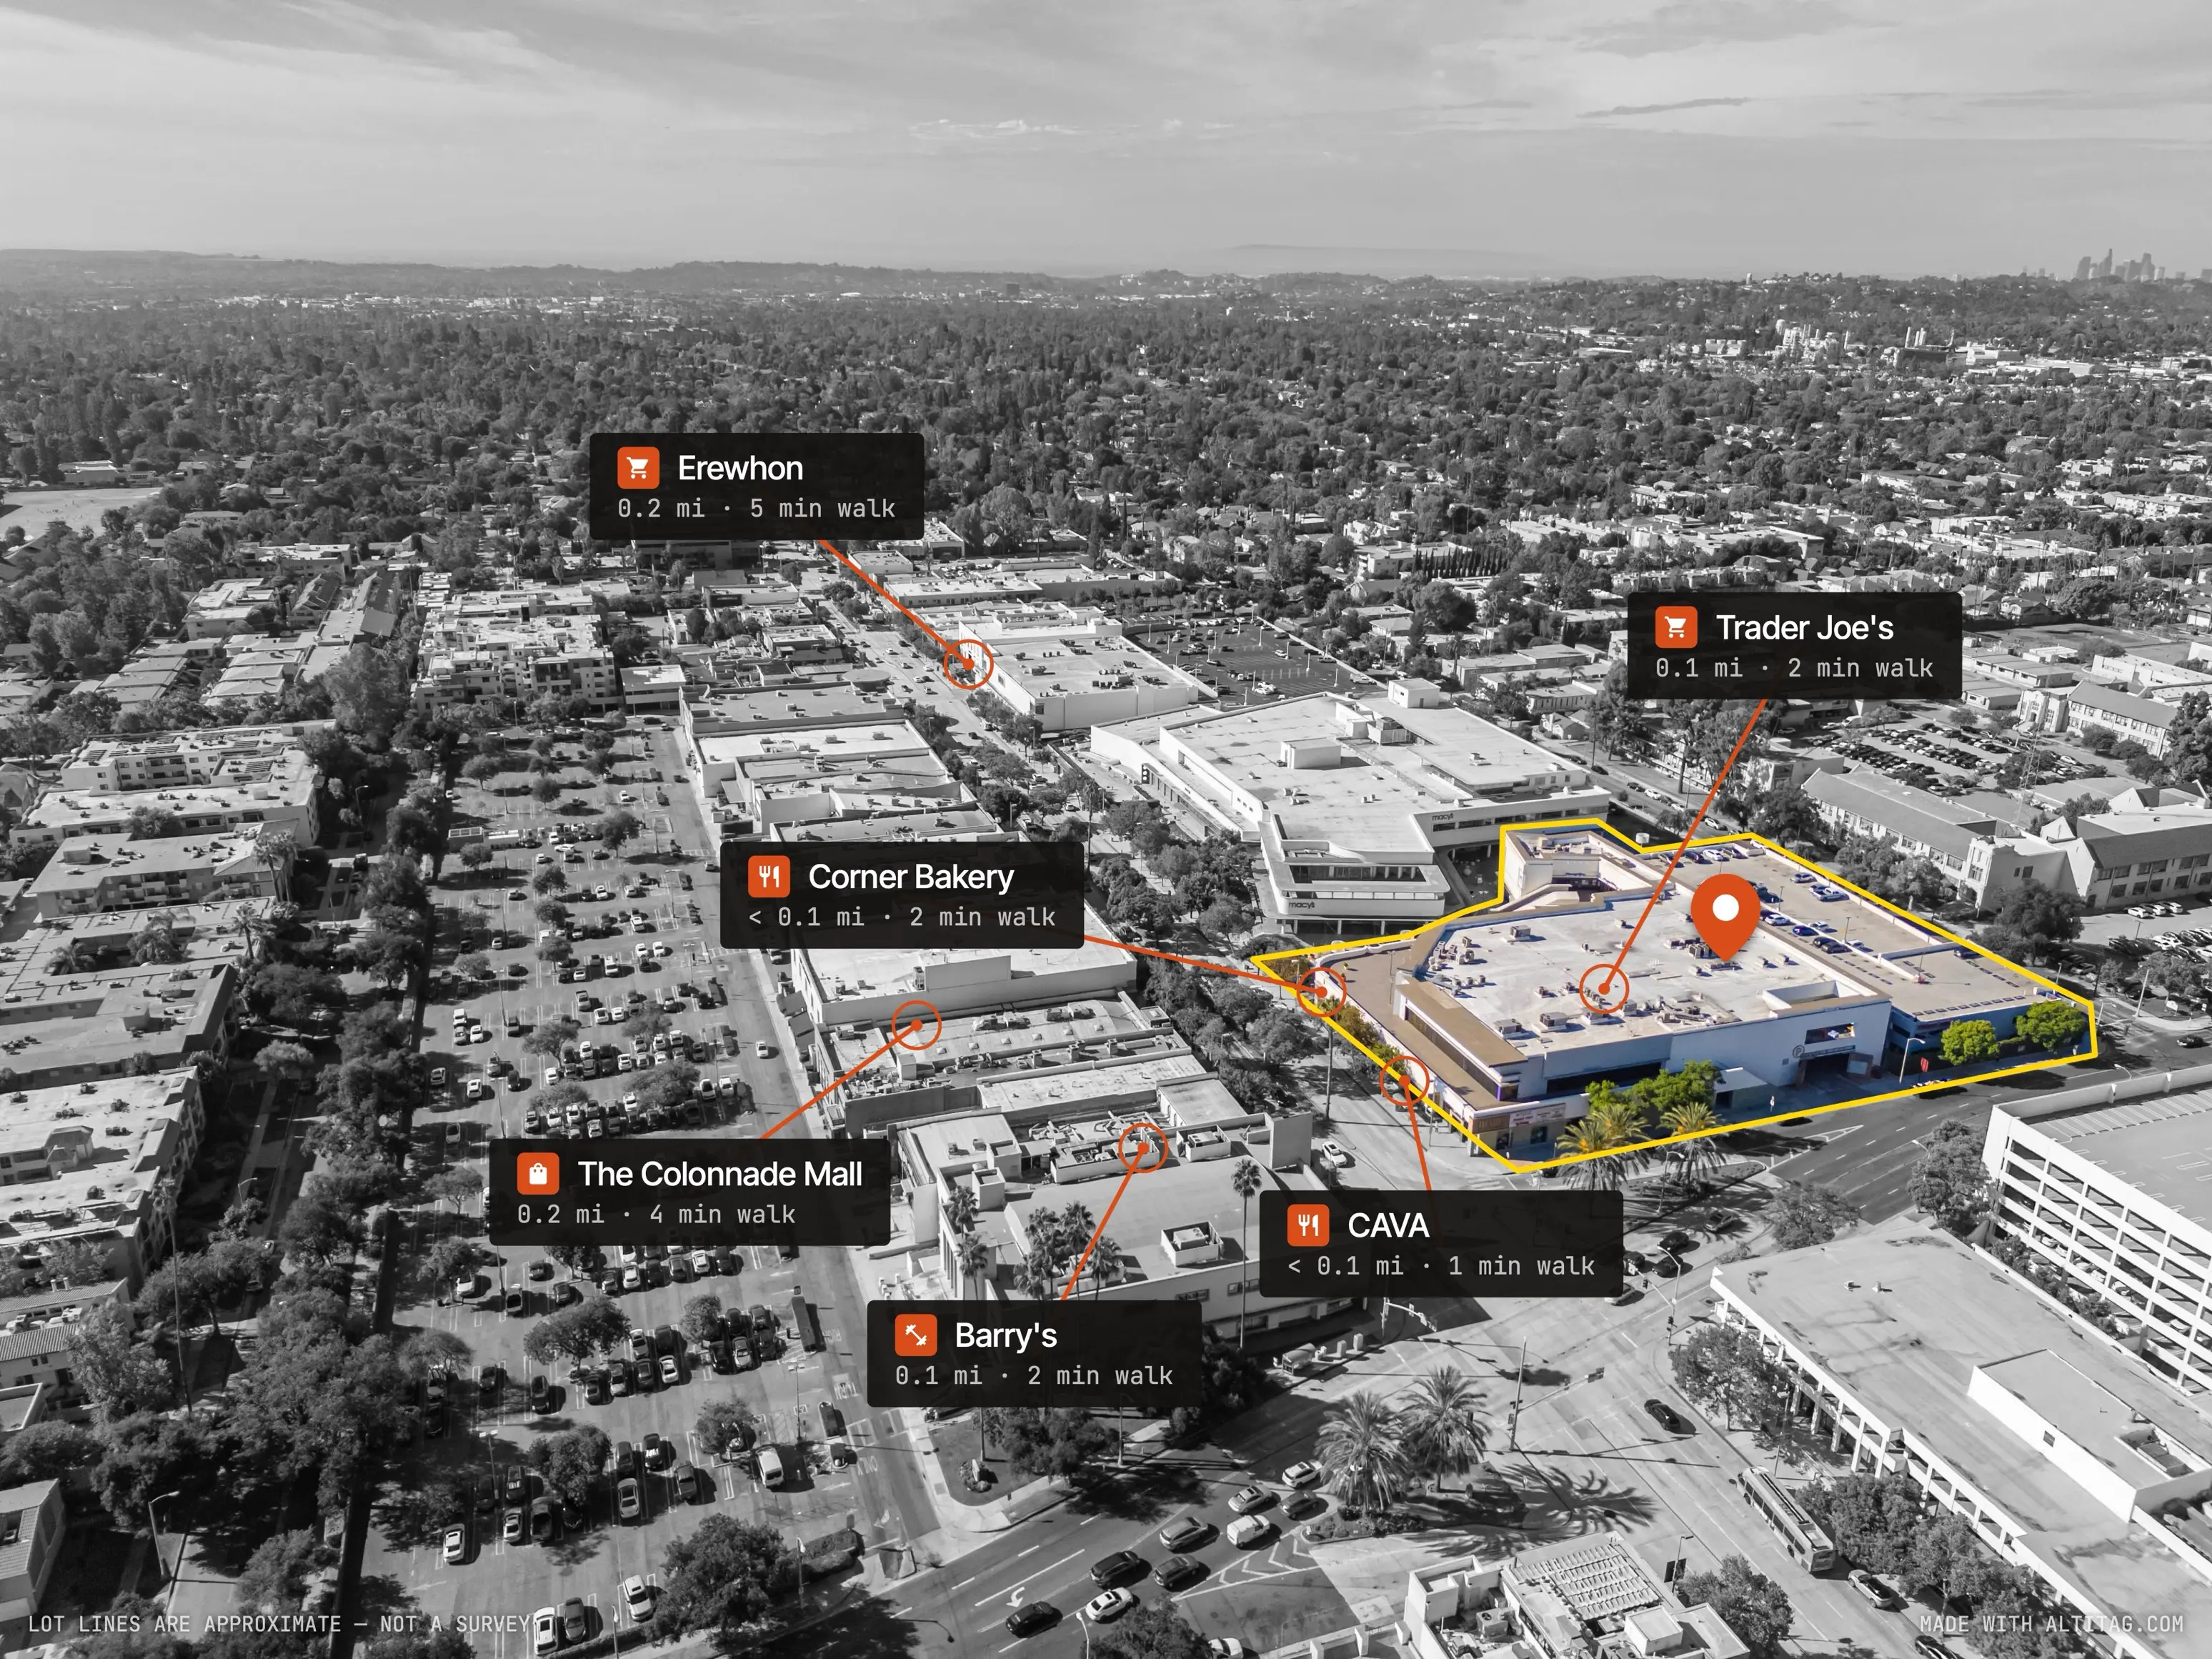
Worth knowing: in both examples above the lot started from the raw county parcel and the labels from the automatic layout — then both got a quick hand pass (corners nudged onto the fence line, a few labels repositioned). That's by design — assessor data is rarely pixel-perfect against a photo, so the corner drags, whole-lot drag and rotate exist exactly to close that last gap. Expect a minute of fitting, not a fight.
On low, oblique shots the house rises above the ground-line polygon, so the top of the building can land in the gray zone. Don't chase it with extra corners — hit Paint color back and brush over it. The circle cursor is the brush's true size: whatever is inside it returns to full color.
5 · Export
Hit Export and everything you see — labels, pin, lot outline, color fade, paint — bakes into a clean JPEG, PNG or WebP at web, MLS or full resolution. All the editing dots and handles are editor-only; none of them appear in the file. Exports are re-encoded in the browser, so no EXIF or GPS data leaves with the file. The B/A button previews the untouched photo any time.
Quick reference
- Labels misaligned? Drag one target dot onto its true building — everything recalibrates.
- Lot tilted vs the streets? Same fix; or use the Rotate slider for the lot alone.
- Pin won't find a lot? Drop it on the property itself — streets have no parcel.
- House top turns gray in fade? Paint color back; don't add corners.
- Panel covering the property? Drag it by its header, or pan/zoom the photo.